Building My Multiband Moxon Antenna
ANTENNA
S21FIA
9/7/20255 min read
The Moxon antenna is a popular choice among radio amateurs due to its unique blend of performance and practicality. Originally designed by the radio enthusiast Les Moxon, this directional antenna exhibits remarkable characteristics that make it suitable for HF bands. The fundamental design principle of the Moxon antenna revolves around its rectangular loop configuration, which results in enhanced gain and directivity compared to traditional dipole antennas. This directional property allows users to achieve better signal strength in specific directions while minimizing interference from unwanted sources.
After returning from the IOTA S21DX DXpedition in December 2024, I had one clear realization: the power of a directional antenna in HF DXing cannot be overstated. Working pile-ups on the island was exhilarating, but it also highlighted the limitations of my home setup. Back in Dhaka, I decided it was time to step up my game and build a directional HF antenna for myself.
What started as a simple decision soon turned into a project full of challenges, learning, and problem-solving. Here’s the story of how my multiband Moxon antenna came to life.
Challenge 1: Limited Space
Like many urban hams, my biggest constraint was space. Living in an apartment complex, there was no way I could install multiple monoband antennas, nor did I have the luxury of a big backyard. A full-sized 20-meter beam alone would have been way too large for my rooftop.
Solution: I needed a multiband antenna—something compact enough to fit in the available space, but still efficient enough to deliver results. As a matter of fact, this constraint directed me to a Multiband MOXON.
Challenge 2: No Compromises Allowed
My mentor, S21RC, was quick to remind me: “Don’t build a compromised antenna.” In his words, if I was going to put in the time, effort, and money, it had to be something with real gain—not just a glorified dummy load.
Solution: I set myself a clear requirement: the antenna had to be full-sized on all target bands and must offer at least 1 dBd of gain.
This immediately ruled out a lot of “all-band” compact solutions that rely heavily on traps or tuners. I needed a design that was both practical and effective.
Challenge 3: Choosing the Right Design
My targeted bands were 20M, 15M, and 10M—the bread-and-butter bands for DXing, especially during good solar conditions. But as mentioned, a full-sized 20-meter beam was out of the question for my rooftop. I started looking into smaller footprint designs like the Hexbeam and the Moxon rectangle. Both are well-known for being efficient, compact, and beginner-friendly.
In the end, I chose the Moxon. The main reasons were:
Material availability (thanks to support from local ham friends)
Simplicity of construction
Compact footprint with good gain and F/B ratio
Challenge 4: Lack of Multiband Designs
While single-band Moxons are well-documented, I struggled to find a working multiband design that would cover 20M, 15M, and 10M without requiring an antenna tuner. I found only one documentation from DU1RZ for making a Multiband Moxon.
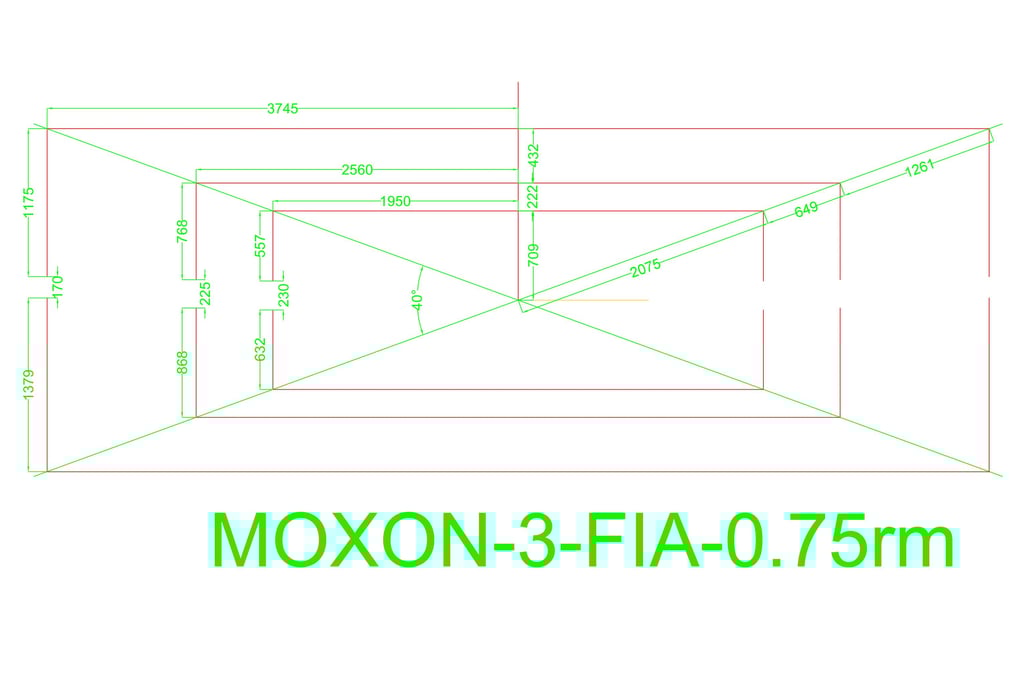
Solution: I turned to EZNEC simulation software. After many hours of trial and error, I was able to fine-tune the wire lengths for both the driven and reflector elements. This gave me the confidence that my build would resonate properly on the chosen bands.
Simulation also helped me understand the trade-offs between element spacing, wire gauge, and boom length, which would have been much harder to figure out by trial alone.
Challenge 5: Rooftop Permission
Just when I was ready to build, another hurdle appeared. My apartment complex committee flatly refused permission to install the antenna on the rooftop. They were worried about “safety” and “interference” issues, despite my attempts to explain.
Solution: This is where the ham spirit of community really shined. My good friend and neighbor, S21RED, offered his rooftop for the project. Without his support, this antenna would have remained a paper design.
Dimentions
The Build: Materials and Design
Once all the planning was done, it was time to roll up my sleeves. Here’s what went into the antenna:
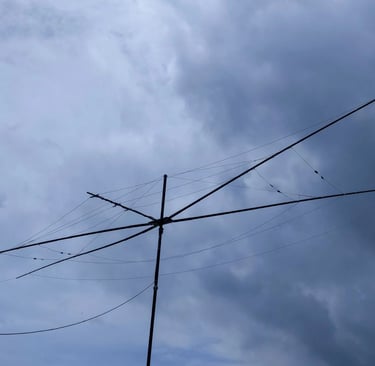
Elements: I used 0.75 mm² multistrand copper wires for the driven element and reflector. Flexible, durable, and easy to work with. (RR Kabel- Locally available)
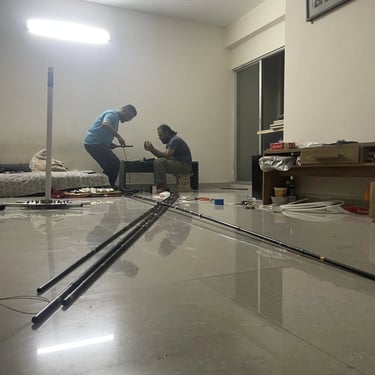
Structure: The frame was built using lightweight fiberglass fishing poles—a generous donation from S21RC. Each pole was 16 feet long, I have used 13 feet of that leaving the front end. Perfect for supporting the wire layout while keeping the antenna light.
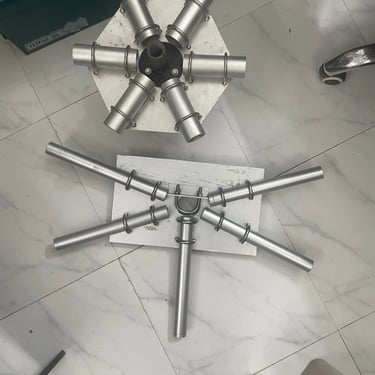
Center Plate: I cut a 3 mm thick aluminum plate using basic hand tools. This plate became the hub for mounting the fishing poles and anchoring the elements.
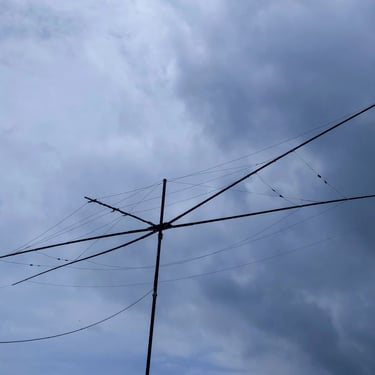
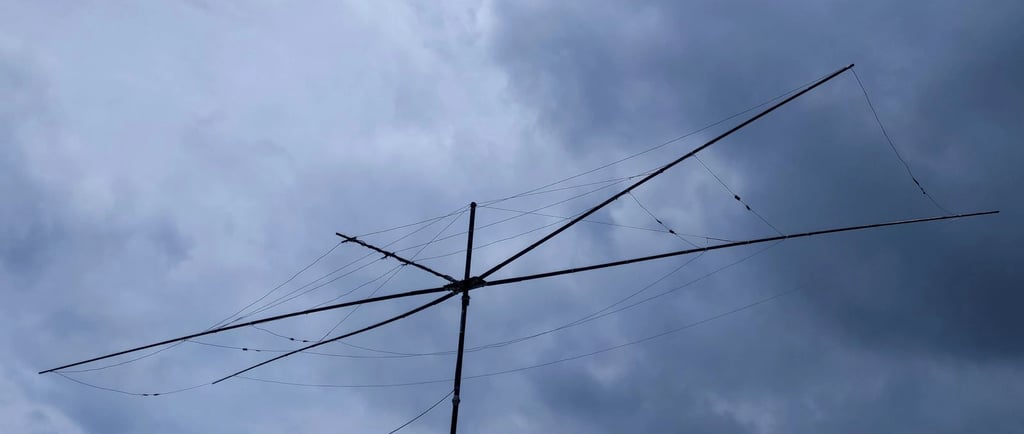
The beauty of the Moxon is its simplicity—two elements bent inwards to reduce size while maintaining gain and a clean radiation pattern.
Step-by-Step Construction Guide
Start by preparing the materials needed for the Moxon antenna.
Antenna elements- wires
Center Post
Fiberglass poles
Cable Lugs
Insulators for wire separation
Cut the wires according to the predetermined measurements. i have cut 50mm extra on each end of the wire so that the extra can be bent while adjusting the tip separator.
Now it's time to prepare the frame. As I have used 4 fishing poles, I had to make an arrangement so that the poles do not sag in between.
Now, proceed to attach the antenna elements to the frame. Each element is mounted parallel to the other, with precise spacing that reflects the design. For the feed point, I connect the coaxial cable RG 58, ensuring a secure and clean connection. It was beneficial to use a CMC at the connection to minimize loss and provide additional signal strength.
Reflections on the Project
Building this antenna taught me more than any book or video could. From simulation to construction, I experienced every step of the process. There were moments of frustration—especially with tuning and adjusting the whole thing—but each hurdle only made the final success more rewarding.
The first time I put the antenna on air and heard strong DX signals rolling in, I knew the effort had paid off. Compared to my old wire dipoles, the Moxon was a huge leap forward. The front-to-back rejection alone made operating more enjoyable, and the gain gave me an edge in pile-ups.
Final Thoughts
For anyone considering a homebrew project, I highly recommend trying a Moxon. It’s simple, effective, and can be adapted to a limited available space. A multiband version requires more effort and simulation work, but it’s worth it if you’re chasing DX across several bands.
And of course, it’s about the joy of calling CQ and hearing someone thousands of kilometers away come back to you.
73,
S21FIA – Maruf

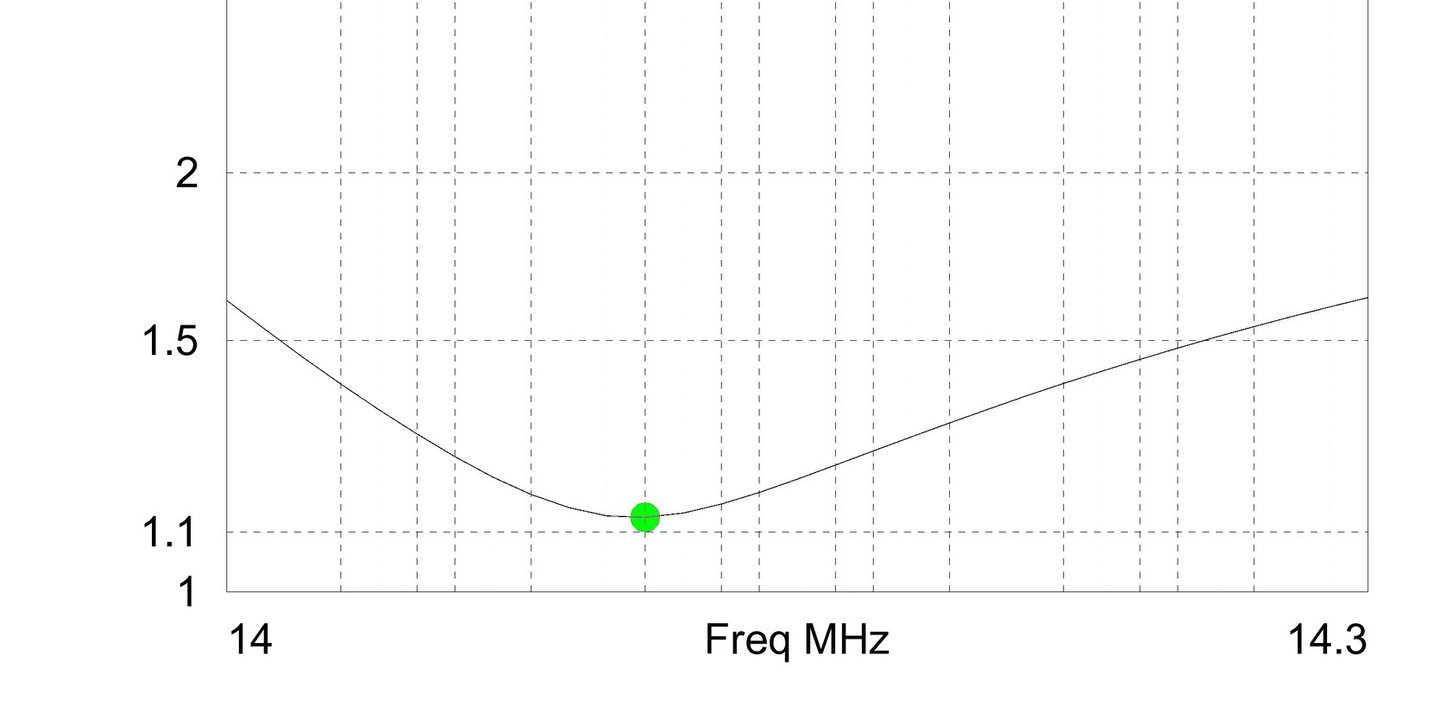
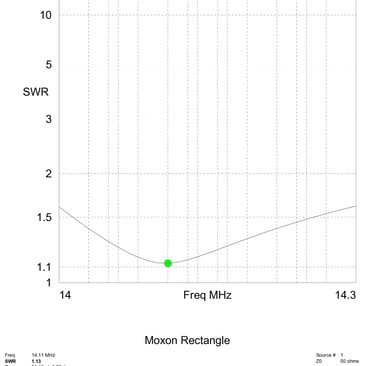
EzNEC Simulation- 20m SWR Plot
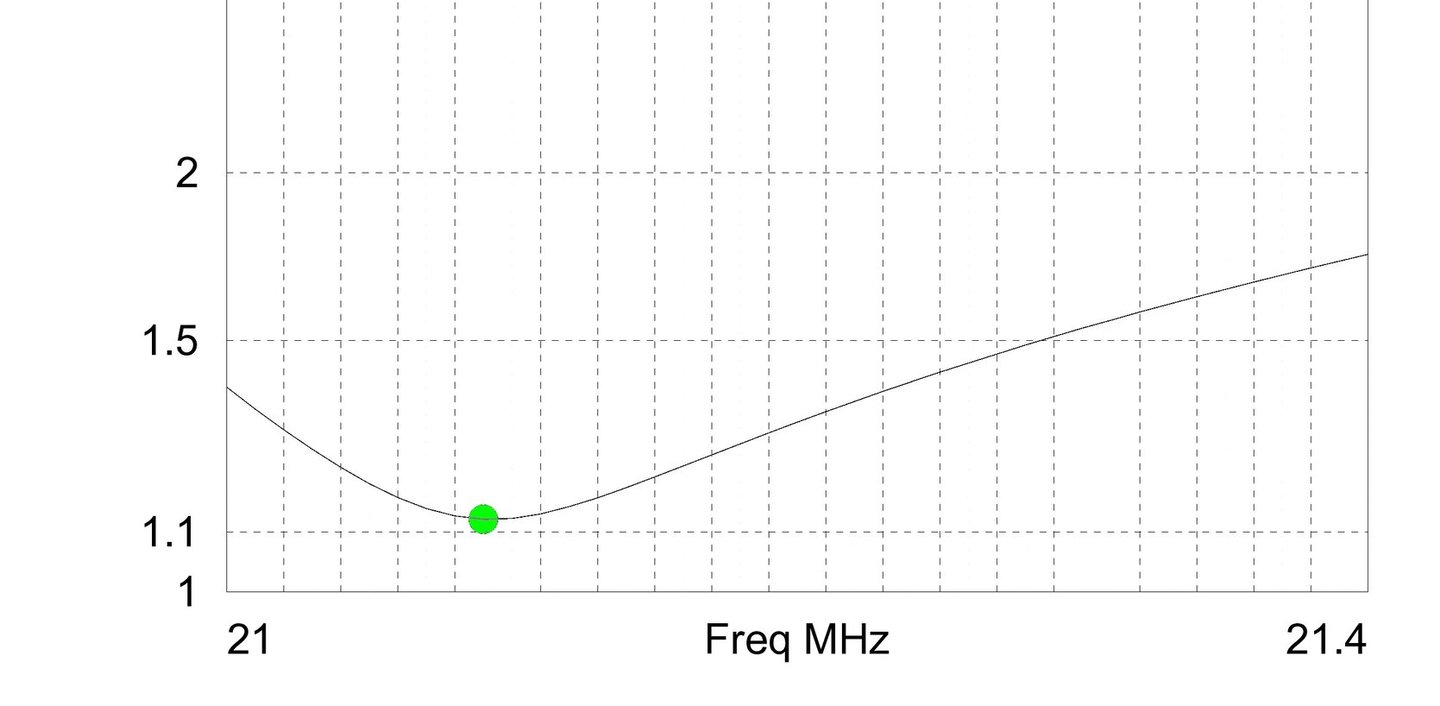
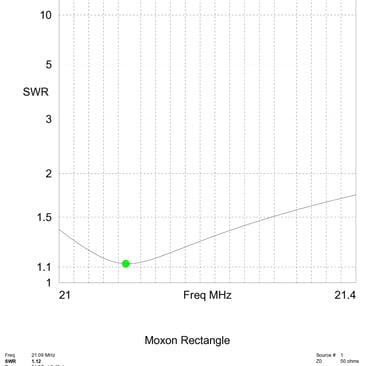
EzNEC Simulation- 15m SWR Plot
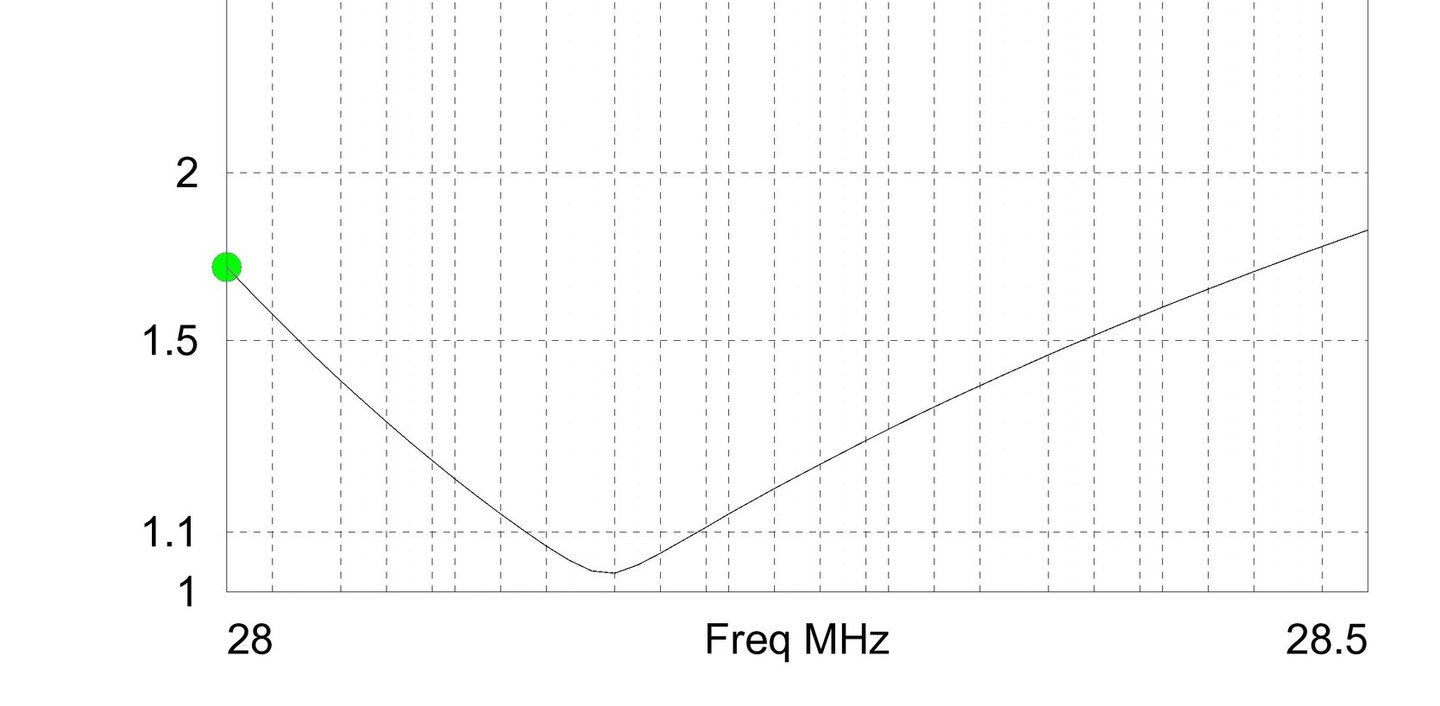
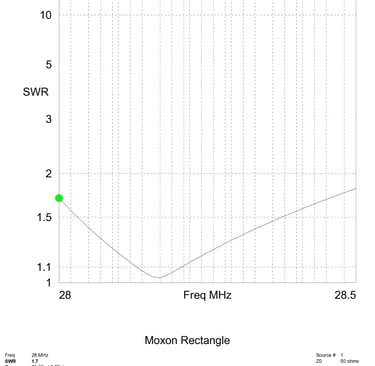
EzNEC Simulation- 10m SWR Plot
EzNEC Simulation- Plots (Click to Download)
Elevation Plot- 20m
Elevation Plot- 15m
Elevation Plot- 10m
Azimuth Plot- 20m
Azimuth Plot- 15m
Azimuth Plot- 10m
IMAGES